
How does Emirex API work? (Emirex.com)
Последнее изменение:
The API Key Generation provides you access to markets and trading services in real time on Emirex through an external resource or application.
Note: Prior to creating an API Keys you should enable 2FA
1. Once you enable 2FA, login to your account and go to your Profile page and select “API Management” from the menu.

2. Create "API Key Label" in the Private API key section.
Note: The field must contain uppercase (A-Z,) lowercase (a-z) and digits (0-9).

3. Press the “Send code” button and the secret code will be sent to your email address.
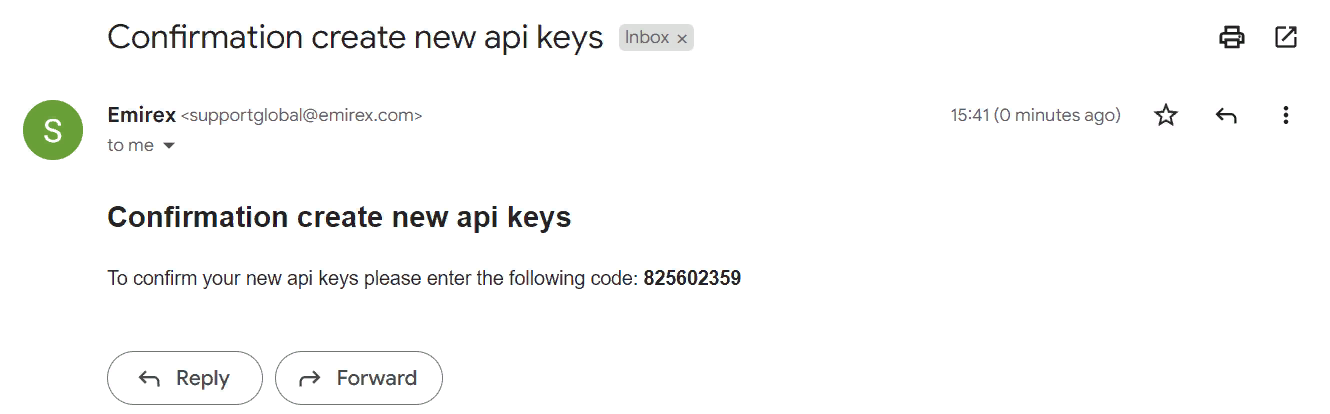
4. Enter the code in the respective field and press the “Add” button.
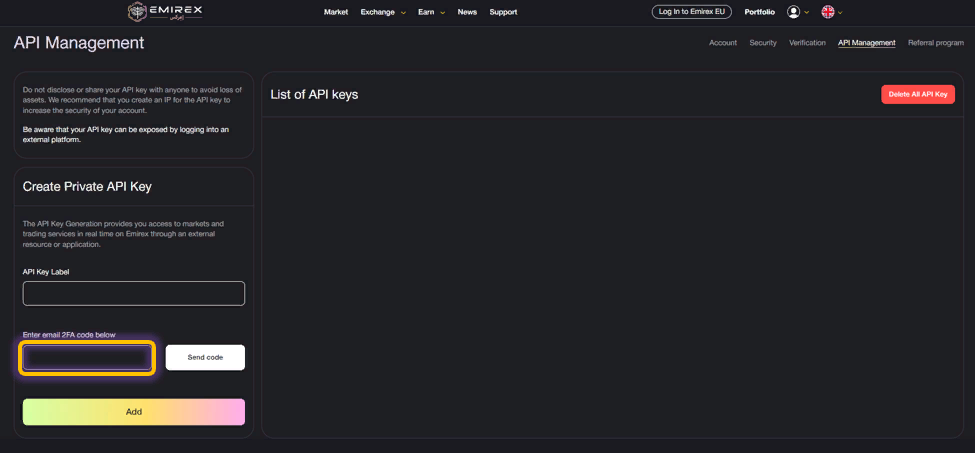
Note: If you have Google 2FA enabled in your account you will be asked to enter your Google 2FA along with the email code.
5. Once you have completed all the steps the Private Secret Key will be generated for you. Copy them to a secure place.
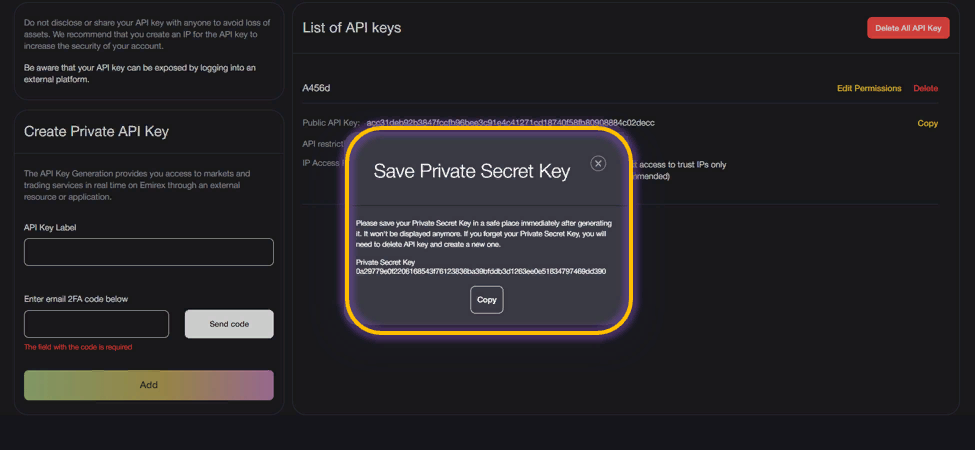
Note: Once this notification is closed, there will not be any chance to save the private keys.
6. The generated API Keys will be reflected under the List of API keys section and contain the following data:
- Public API key - A public key can be shared with collaborators and is more limited in access to the API’s data and functions.
- API restrictions: read, trade and withdraw.
- IP Access restrictions: API key available to all IP addresses (Not recommended) and access to trust IPs only (Recommended)

7. You may edit permissions by clicking on “Edit permissions” button opposite the respective API keys. The check boxes will become active.
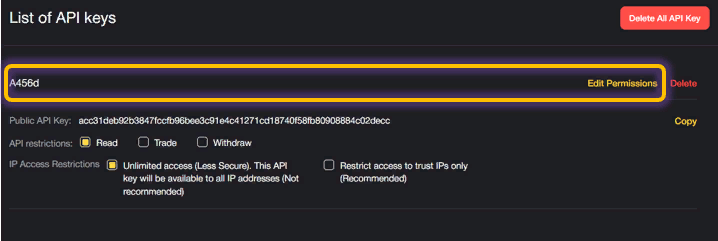
8. You can add options as “Trade” and “Withdraw” in the API restrictions section and you may restrict access to trust IPs only.
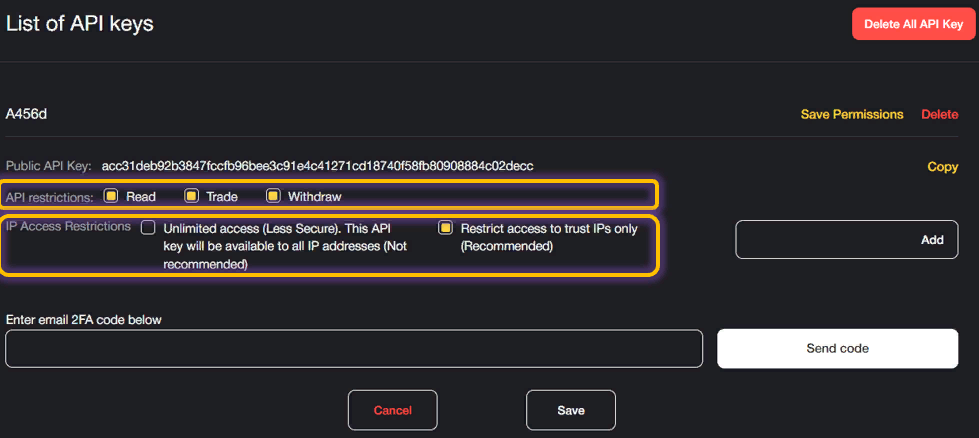
9. Once the changes are made, press “Send code” button and the secret code will be sent to your email address.
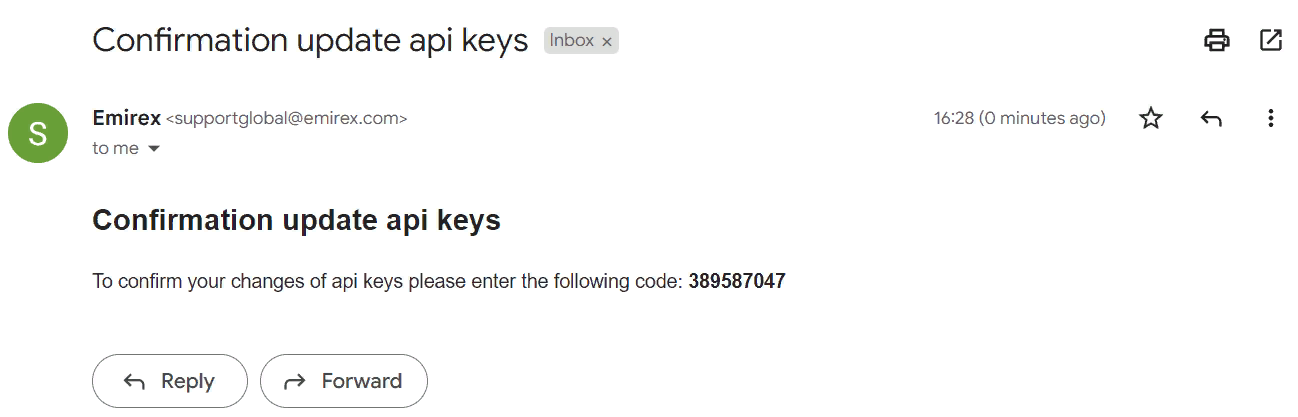
10. Once you enter the code from the email, your API keys will be updated.
Note: If you have Google 2FA enabled in your account you will be asked to enter your Google 2FA along with the email code.
11. To delete the API keys, press on the “Delete” button
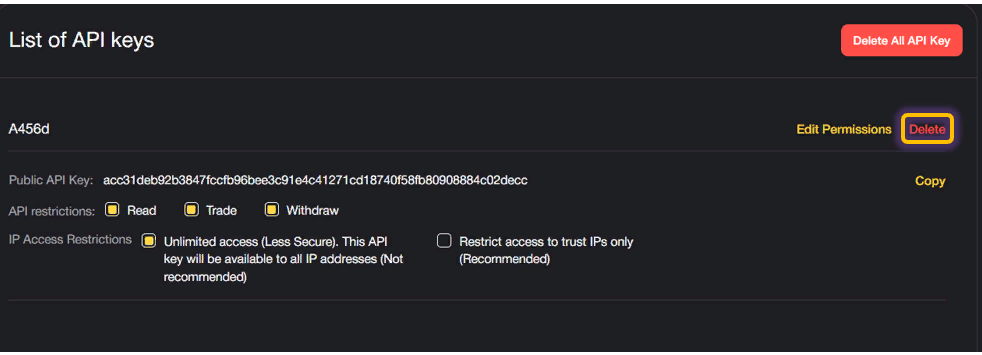
12. Enter the email code and press on a “Send code” button.
Note: If you have Google 2FA enabled in your account you will be asked to enter your Google 2FA along with the email code.
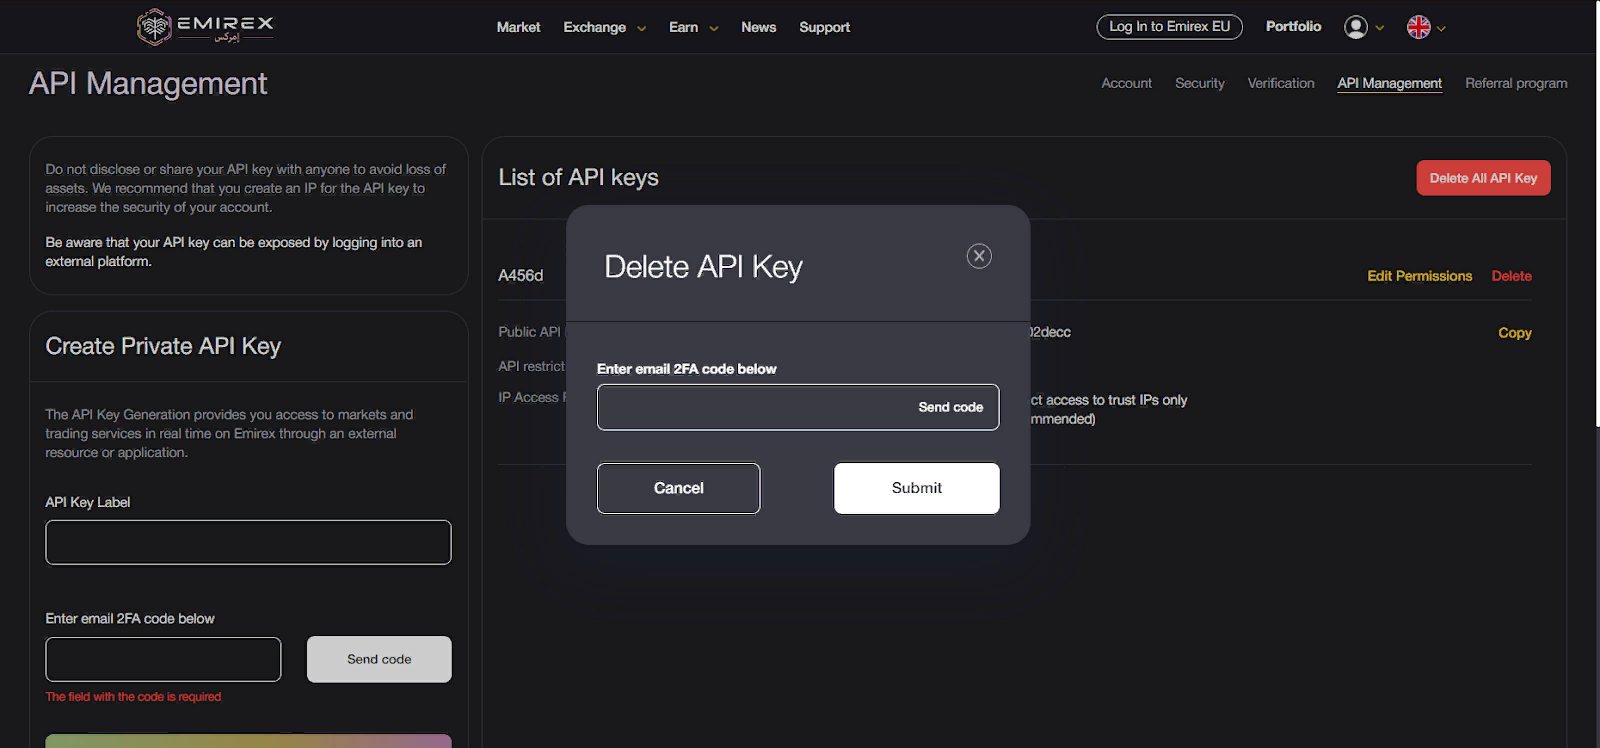
13. You can also use the “Delete All API Key” button and the process will be the same.
14 Once you have completed all the steps your API keys will be deleted.
If you still have questions, please contact us, we will be happy to help!